HOW TO PROPERLY TORQUE FLANGES
CHALLENGE: FLANGES THAT LEAK, WARP AND FAIL

Exhaust flanges that are improperly tightened or torqued can cause many problems, including exhaust system leaks; associated component failure of gaskets and studs; and premature system fatigue and failure.
SOLUTION: PROGRESSIVELY TIGHTEN BOLTS ON FLANGES
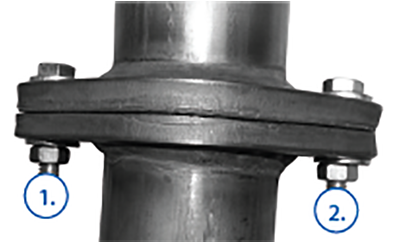
Flanges are found on a variety of parts associated with exhaust repairs. Each has its own process for achieving proper torque and successful installation. In general, all nuts are secured following a progressive, higher torque sequence. For example, the nuts require 60-ft.-lbs. of torque. Begin by torquing nut one, two and three to 20-ft.-lbs. Then, tighten all three nuts to 40-ft.-lbs., and finish by tightening each to 60-ft.-lbs.

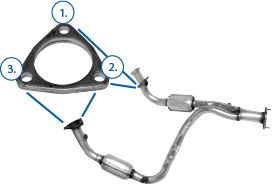
For Y-Pipes:
It’s important to secure both sides of the Y-pipe simultaneously. Begin by tightening nuts down in a rotating sequence between both pipes. It is also necessary to alternate between both flanges found on the Y-pipe.

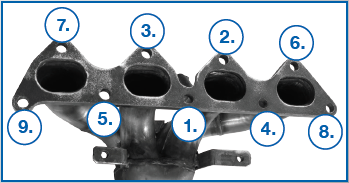
For Manifold Converters:
Typically, the tightening sequence begins in the middle of the manifold while working your way out evenly between both sides. Be sure to review manufacturer’s recommended torque sequence for each application.
IMPORTANT: In all installation instances above, tighten all studs evenly throughout the process.
Learn more about quality exhaust parts, find the right car part, or find a local repair shop today.
The content contained in this article is for informational purposes only and should not be used in lieu of seeking professional advice from a certified technician or mechanic. We encourage you to consult with a certified technician or mechanic if you have specific questions or concerns relating to any of the topics covered herein. Under no circumstances will we be liable for any loss or damage caused by your reliance on any content.